Mastering Light: KeyShot Lighting Essentials for Stunning Renders
Unveiling the Art of Illumination in Your 3D Visualizations
Welcome, fellow creators and visual artists! If you’ve ever marveled at a photorealistic render and wondered about its secret sauce, chances are, impeccable lighting played a starring role. Today, we’re diving deep into the fascinating world of lighting within KeyShot, exploring the fundamentals that transform a good render into a truly exceptional one. Think of yourself as a digital photographer, armed with an array of virtual lights, ready to sculpt and define your product with brilliance.
The Crucial Role of Lighting in Your Renders
In the realm of 3D rendering, lighting isn’t just about making things visible; it’s about storytelling, mood-setting, and revealing the intricate details of your design. Just as a professional photographer meticulously arranges lights in a studio, you, as a KeyShot user, wield similar power. The way light interacts with your model—its color, intensity, and direction—can drastically alter perception, convey quality, and evoke specific emotions. From capturing the cool, crisp feel of an LED-lit product to the warm glow of an incandescent-illuminated scene, understanding light’s nuances is paramount for achieving unparalleled realism.
Getting Started: A Glimpse into the Lighting Lab
We’ll begin our journey by exploring the core principles of lighting, understanding how light behaves within the KeyShot environment. Whether you’re a seasoned professional or just starting, our goal is to demystify the process, turning complex concepts into actionable techniques. We’ll cover everything from the ease of drag-and-drop lighting to the strategic placement of various light sources.
Consider this your hands-on guide to mastering KeyShot’s powerful lighting tools. You’ll learn how to acquire and fine-tune High Dynamic Range Imaging (HDRI) environments, explore different physical light profiles, and understand when and why to apply specific lighting options. We’ll also delve into creating custom presets and importing third-party HDRIs to expand your creative palette.
For those eager to follow along, exclusive downloadable content, including scene files, is available on The Transcendent’s agenda page. We encourage you to download these resources and experiment as we progress.
The Photographer’s Perspective: Lighting for the Lens
Embracing the mindset of a product photographer is a game-changer when illuminating your scenes in KeyShot. The fundamental principles of lighting a virtual studio mirror those of a physical one, but with the distinct advantage of bypassing the logistical challenges of manipulating bulky lights, softboxes, or cumbersome tables. Imagine “painting” your object with light; every color and tone you choose contributes significantly to your product’s visual narrative.
Selecting the appropriate light temperature is crucial for staging your scene and enhancing its realism. Cooler LED lights contrast with the warm, orange glow of incandescent bulbs. The time of day can also be subtly conveyed through the warmth or coolness of your light sources. A keen awareness of these subtleties can dramatically improve the realism of your product renders, whether bathed in natural window light or meticulously arranged in a controlled studio environment. Your ultimate goal is to achieve the precise mood and feel desired for your project.
A conceptual render illustrating different light temperatures (cool vs. warm) on a product.
The Three-Point Lighting Standard
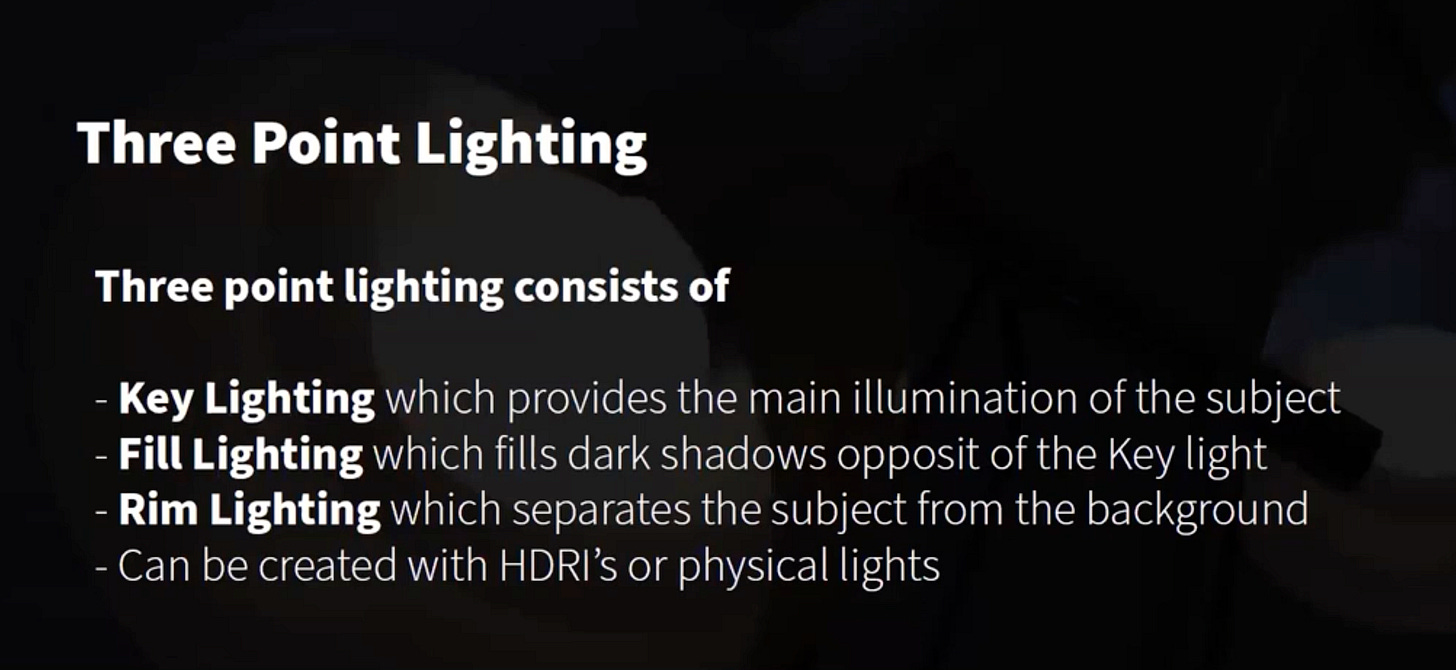
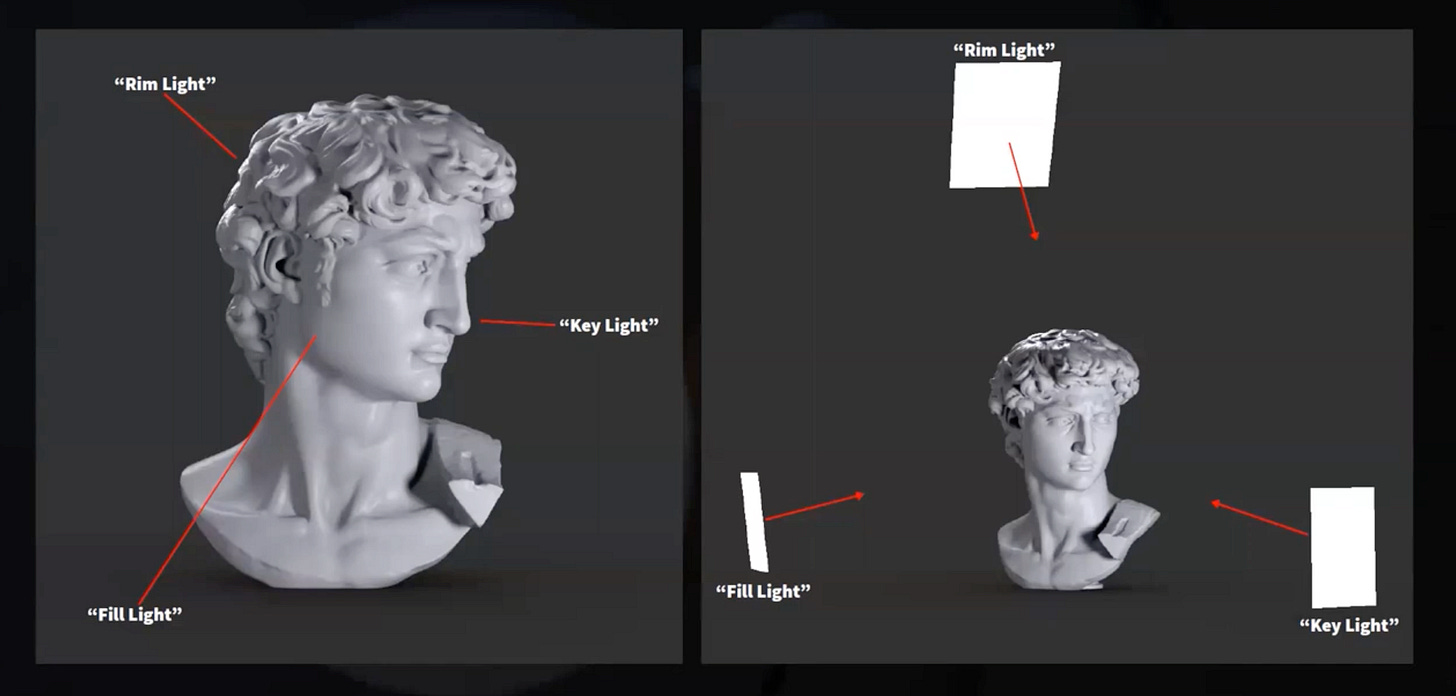
A fundamental technique revered by photographers is three-point lighting. This classic setup strategically employs three distinct lights:
Key Light: This is your primary and most intense light source, typically positioned at a front three-quarter angle to your subject. It defines the main form and casts the most prominent shadows.
Fill Light: Used to soften and subtly diminish shadows created by the key light on the opposite side of your subject. It prevents harsh, dark areas without eliminating all shadow, maintaining depth.
Backlight (or Rim Light/Hair Light): Positioned behind or above the subject, this light outlines the object, effectively separating it from the background and adding a sense of depth and dimensionality.
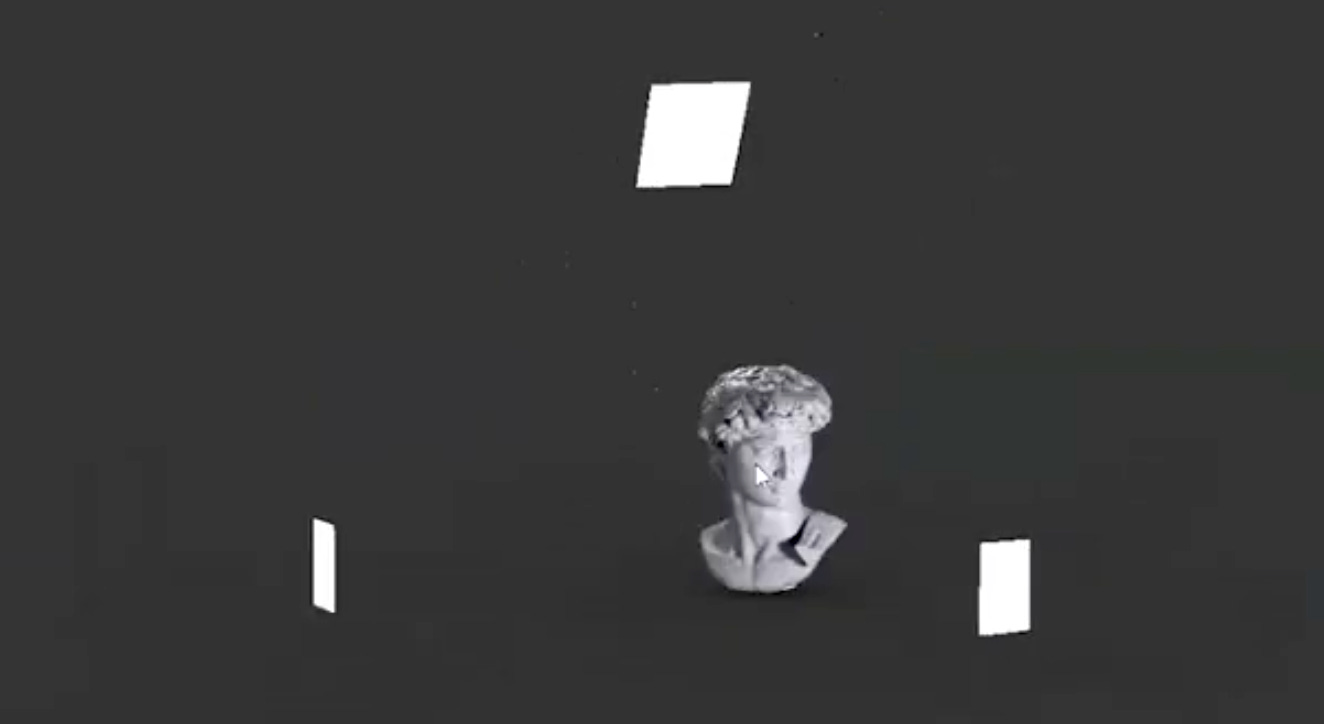
In KeyShot, you can replicate this effect by precisely placing physical lights to simulate real-world light sources. Alternatively, the HDRI editor can be employed to create a similar, though subtly different, three-point lighting effect due to how HDRIs distribute light across the scene. While countless other lighting methods exist (even using a single light), three-point lighting remains an excellent starting point for comprehensively showcasing product details, bringing all elements into clear focus.
Diving Deeper into KeyShot’s Light Sources
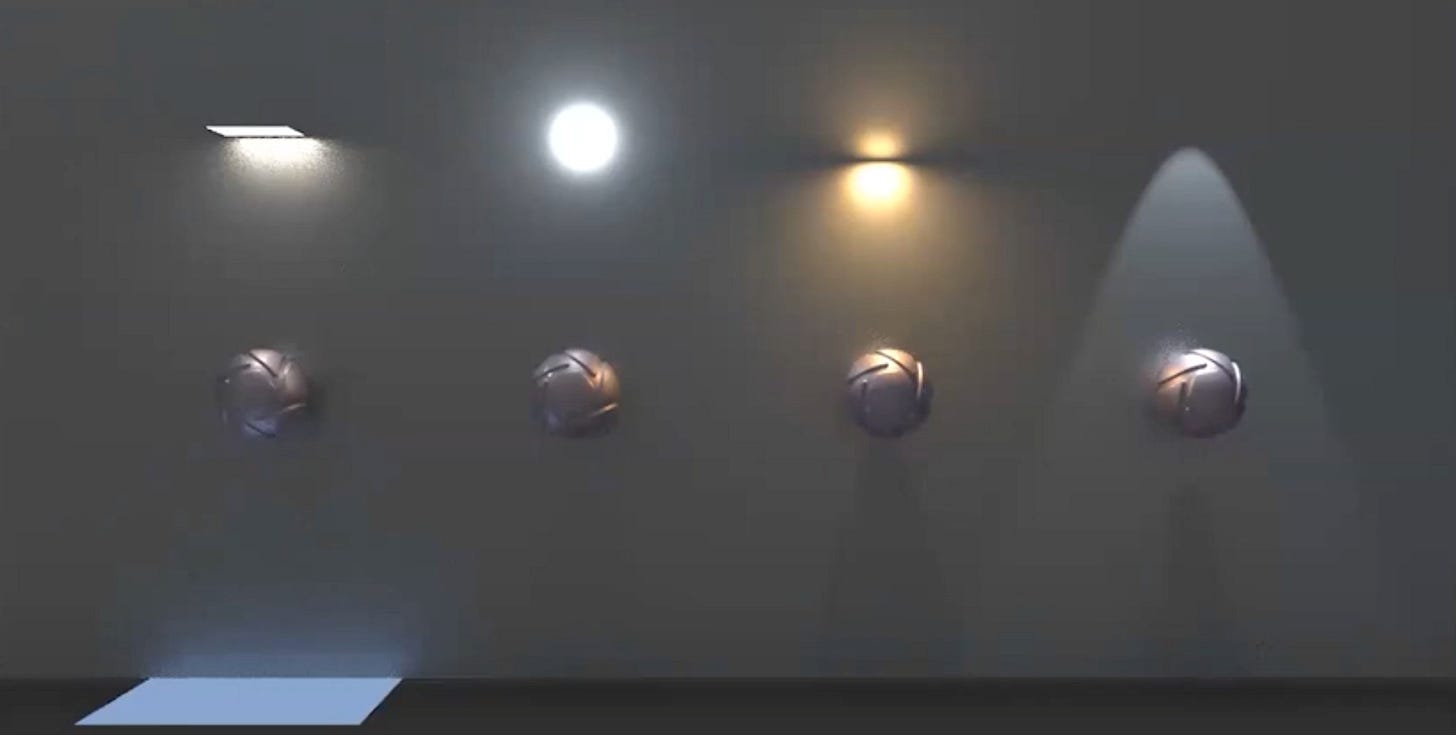
KeyShot provides a versatile array of light sources, each with unique characteristics and applications. Understanding these will empower you to create diverse and compelling lighting scenarios:
Area Lighting: Broad Illumination for Soft Effects
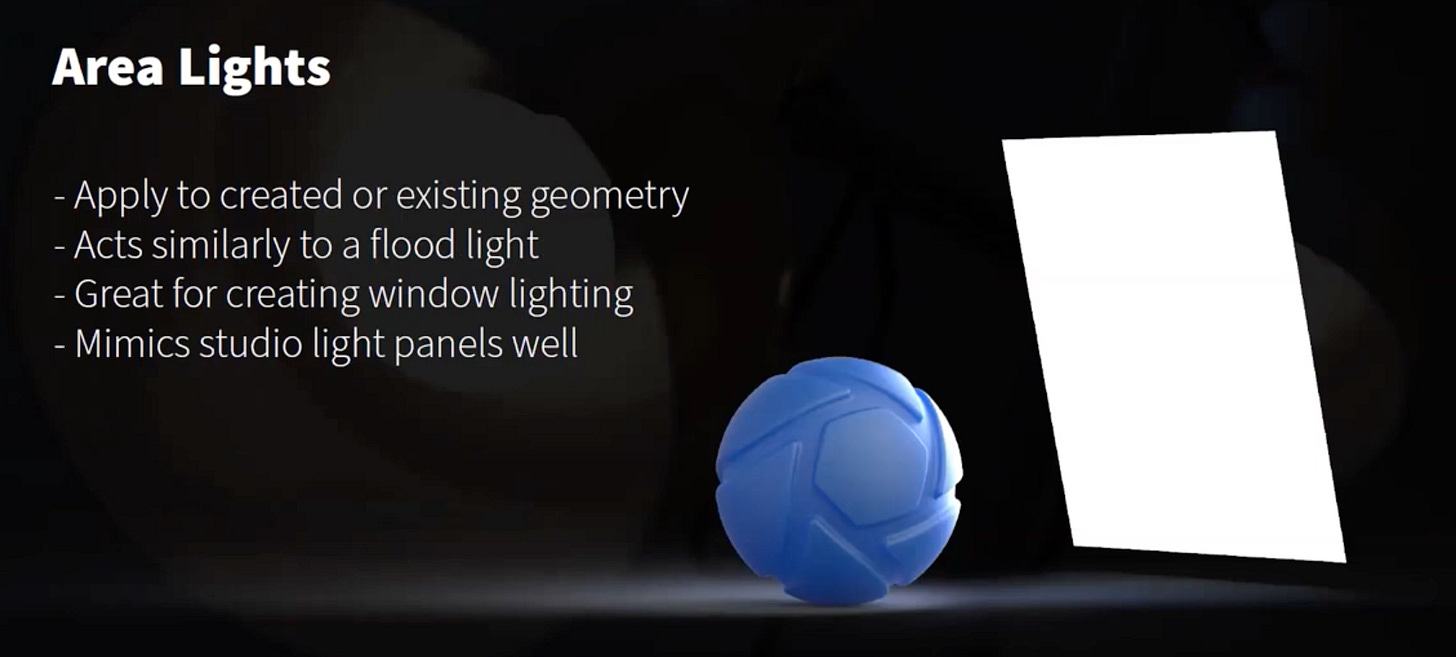
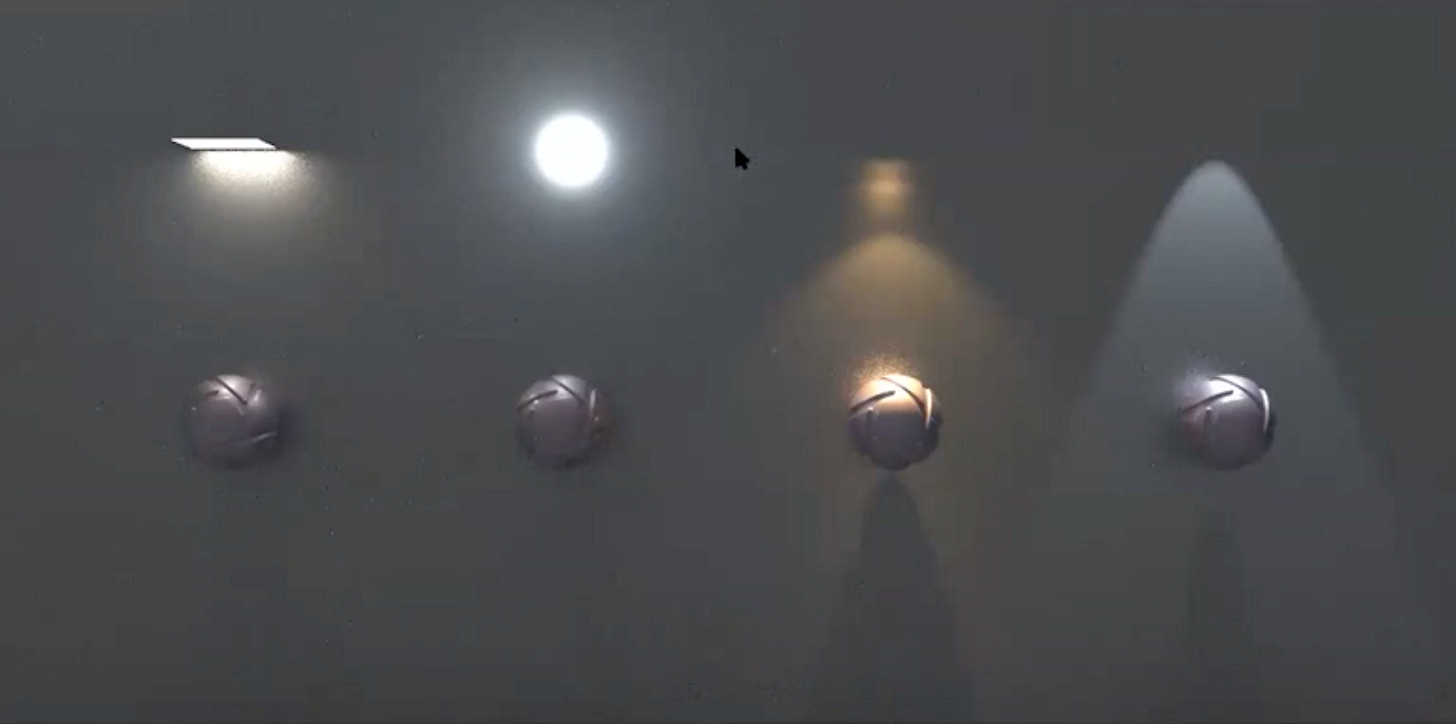
Similar to a floodlight or a studio softbox, an area light casts diffuse, expansive light outwards from its source, effectively filling a scene with soft illumination. Creating area lights is straightforward: simply drag and drop geometry from the models tab in the library panel and then change its material type to “area light.”
Ideal for: Large light sources like studio panel lights, mimicking light from windows and open doors.
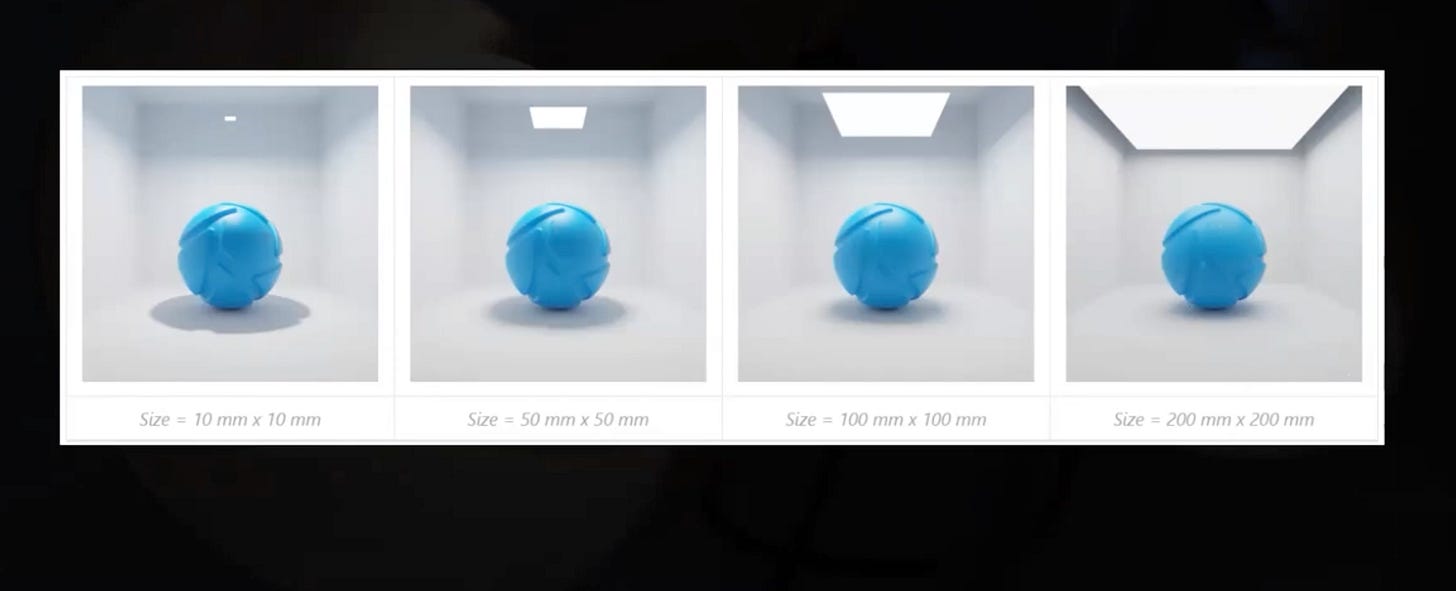
Effect: Produces soft, diffused lighting effects. Larger area lights generate softer shadows, while smaller ones create sharper, more defined shadows.
An infographic demonstrating how area lights create soft, even illumination.
IES Lighting: Precision for Architectural Designs
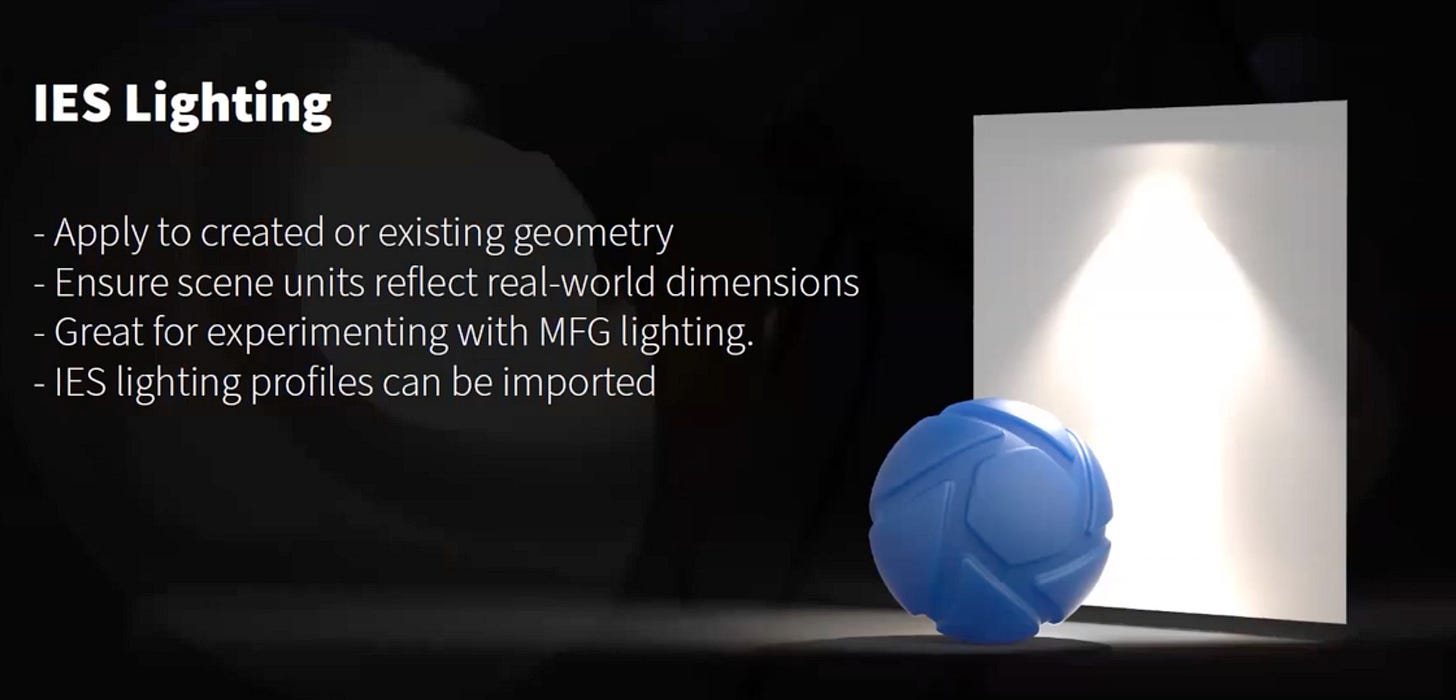
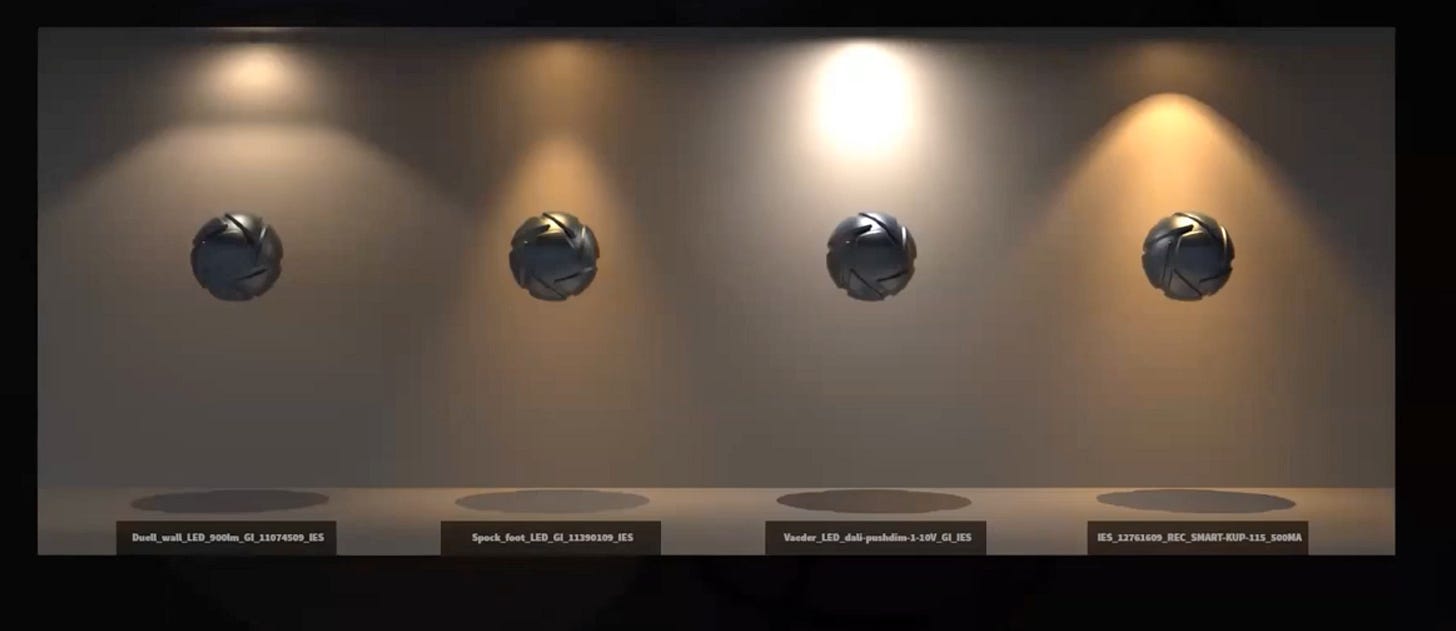
Crucial for interior and architectural designers, IES profiles are digital files that accurately simulate the real-world light output parameters of specific light fixtures. This means that for realistic results, your scene units must precisely reflect real-world dimensions.
Features: KeyShot offers several built-in IES profile options. Users can also import profiles from common lighting manufacturers, ensuring accurate reflections of specific light sources within interior environments.
Application: Essential for visualizing how specific downlights, spotlights, or wall washers will behave in an architectural space.
A graphic representing an IES light beam pattern projected onto a surface.
Point Lighting: The Omnidirectional “Mini-Sun”
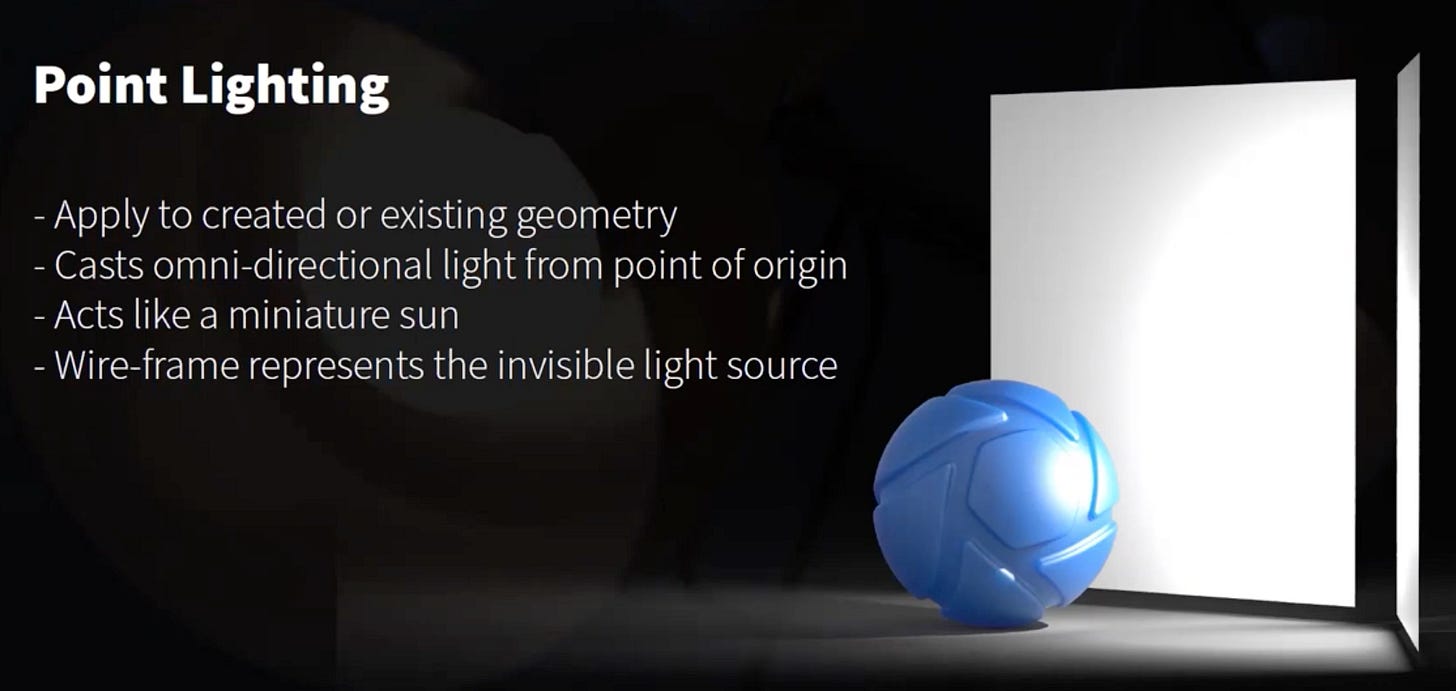
A point light is an omnidirectional light source that functions like a miniature sun, casting strong, hard shadows from an invisible origin. It emits light equally in all directions.
Ideal for: Creating focused light sources, such as bare light bulbs, or simulating a small, intense light source.
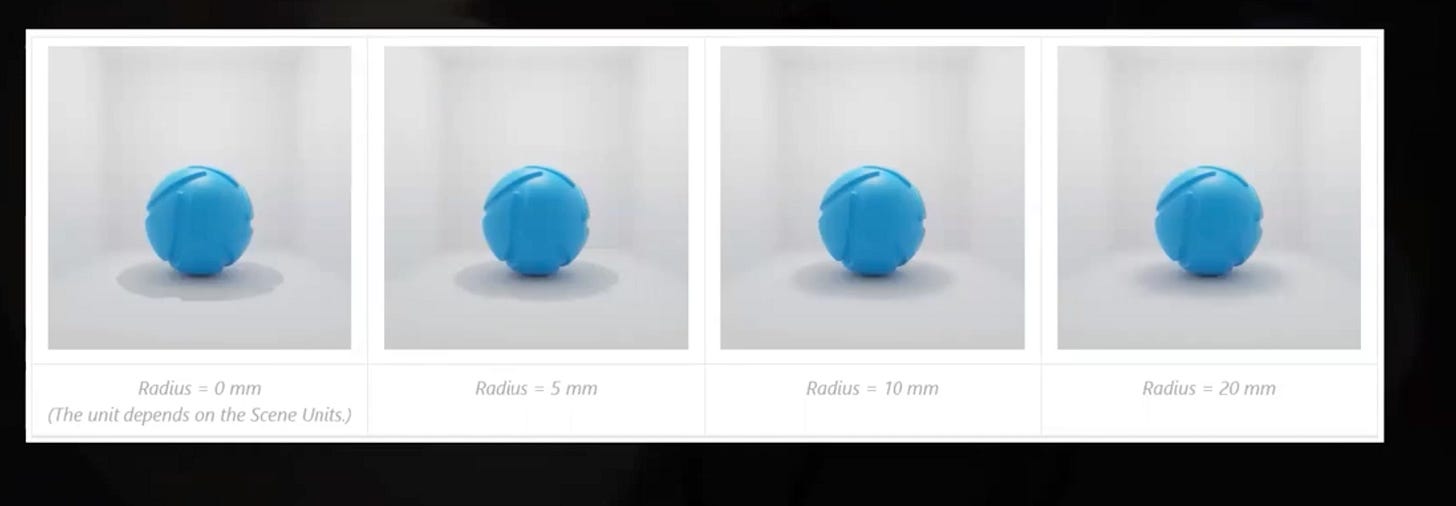
Adjustments: Users can fine-tune power (in watts or lumens) and radius. A smaller radius yields sharper, more defined shadows, while a larger radius softens them.
Spot Lighting: Focused Beams for Drama
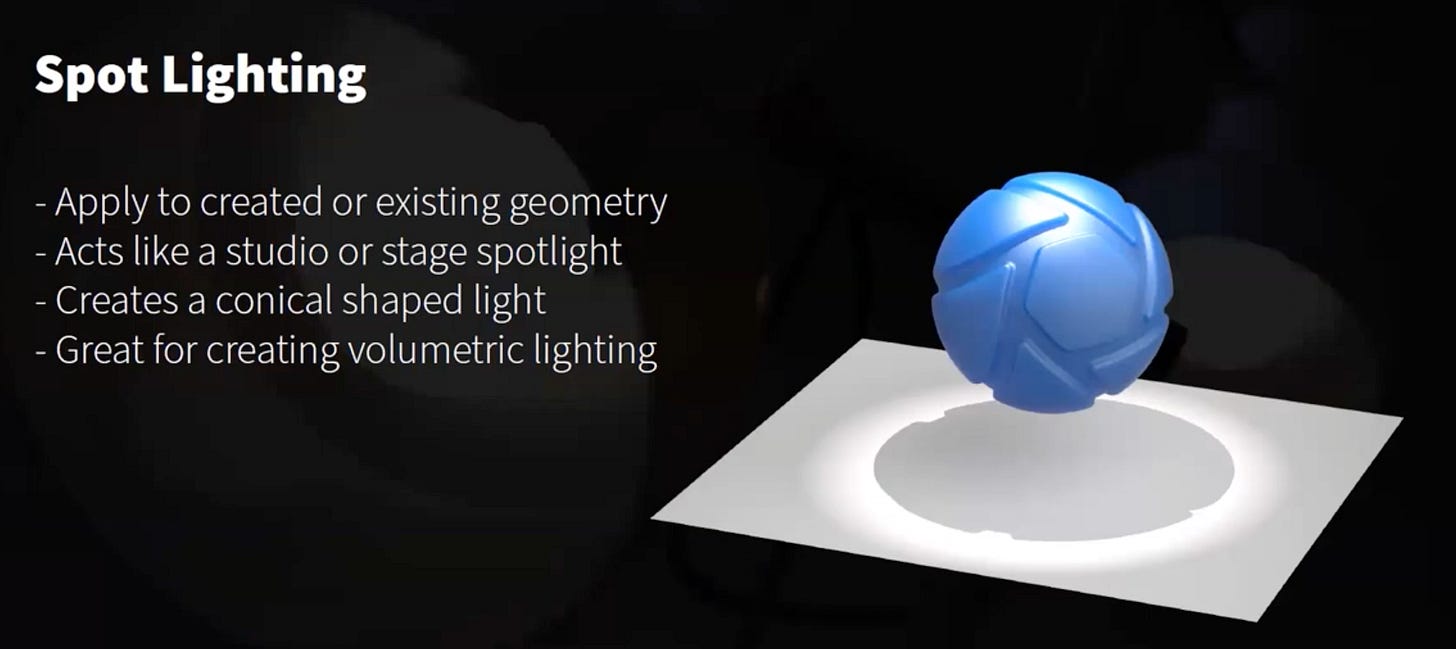
A clipped point light, spot lighting emits light in a conical manner, mimicking studio or stage lights. This focused beam allows for dramatic and controlled illumination.
Ideal for: Dramatic overhead lighting for vehicles or products, concentrated light elements like can lights in an interior scene, or highlighting specific features.
Effects: Spotlights, especially when combined with scattering medium (like fog or haze), can create incredibly dramatic volumetric effects, adding atmosphere and depth.
The Power of HDRIs vs. Physical Lights: When to Use Which
Choosing between HDRI (High Dynamic Range Imaging) environments and physical lights is a critical decision that impacts both realism and rendering efficiency:
HDRI Environments: Efficiency and Global Illumination
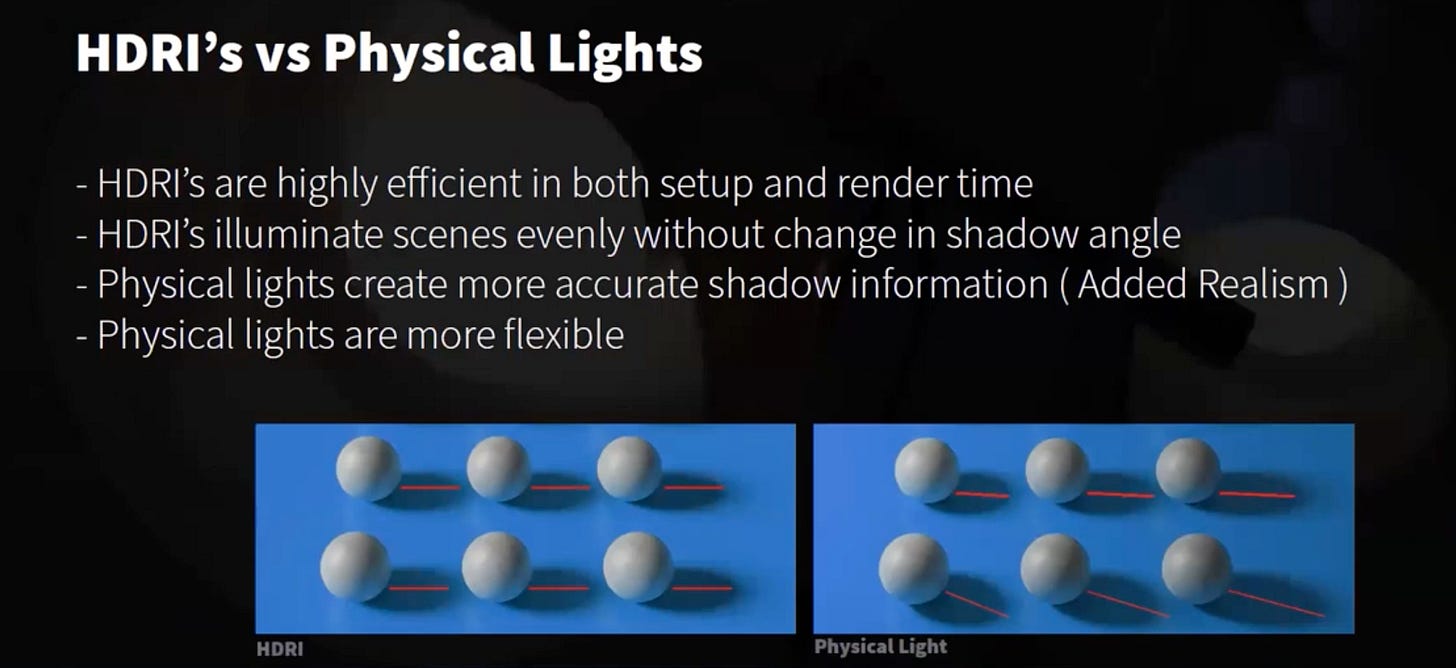
HDRIs offer an incredibly efficient way to set up your scene’s lighting, often leading to faster rendering times. They typically provide global illumination, meaning they light all objects uniformly, simulating real-world environments captured as 360-degree panoramic images. This makes them excellent for quick setups and establishing overall ambient light and reflections.
Physical Lights: Unparalleled Realism and Dynamic Interactions
Physical lights, on the other hand, mimic real-world light interactions with greater accuracy, creating a dynamic realism that HDRIs alone often cannot achieve. For instance, physical lights will cast shadows that vary in length and direction based on the object’s distance and offset from the light source – a nuanced effect that is challenging to replicate with a single HDRI.
While physical lights can be more computationally intensive and may sometimes introduce “hot spots” (overly bright areas), they offer unparalleled realism and precise control over direct illumination and complex shadow casting. Often, the most compelling renders combine both: a subtle HDRI for ambient light and reflections, augmented by carefully placed physical lights for key illumination and dramatic effects.
Custom Presets and Environmental Control: Fine-Tuning Your Vision
KeyShot’s lighting tab within the project panel is your command center for global lighting adjustments. Here, you’ll find powerful tools to refine your final images:
Lighting Presets: Optimized Settings for Every Scenario
KeyShot offers several built-in lighting presets, each optimized for different rendering goals:
Performance: Offers the fastest rendering times but sacrifices some detail. Ideal for quick previews or early-stage visualization.
Basic: Introduces fundamental ray bounces and self-shadows, providing a slightly higher level of realism than Performance mode.
Product: A balanced preset, increasing ray bounces and toggling additional settings for enhanced realism, perfect for detailed product shots.
Interior: Specifically designed for indoor scenes, this preset significantly increases ray bounces to accurately simulate light interaction within enclosed spaces.
Jewelry: The most intensive preset, maximizing realism, enabling caustics for realistic light interaction with clear and translucent objects like diamonds and glass. This mode delivers stunning visual fidelity for intricate reflective and refractive materials.
You also have the flexibility to create and save custom presets, tailoring settings precisely to your unique workflow and rendering needs.
The Environment Tab: Shaping Your Digital World
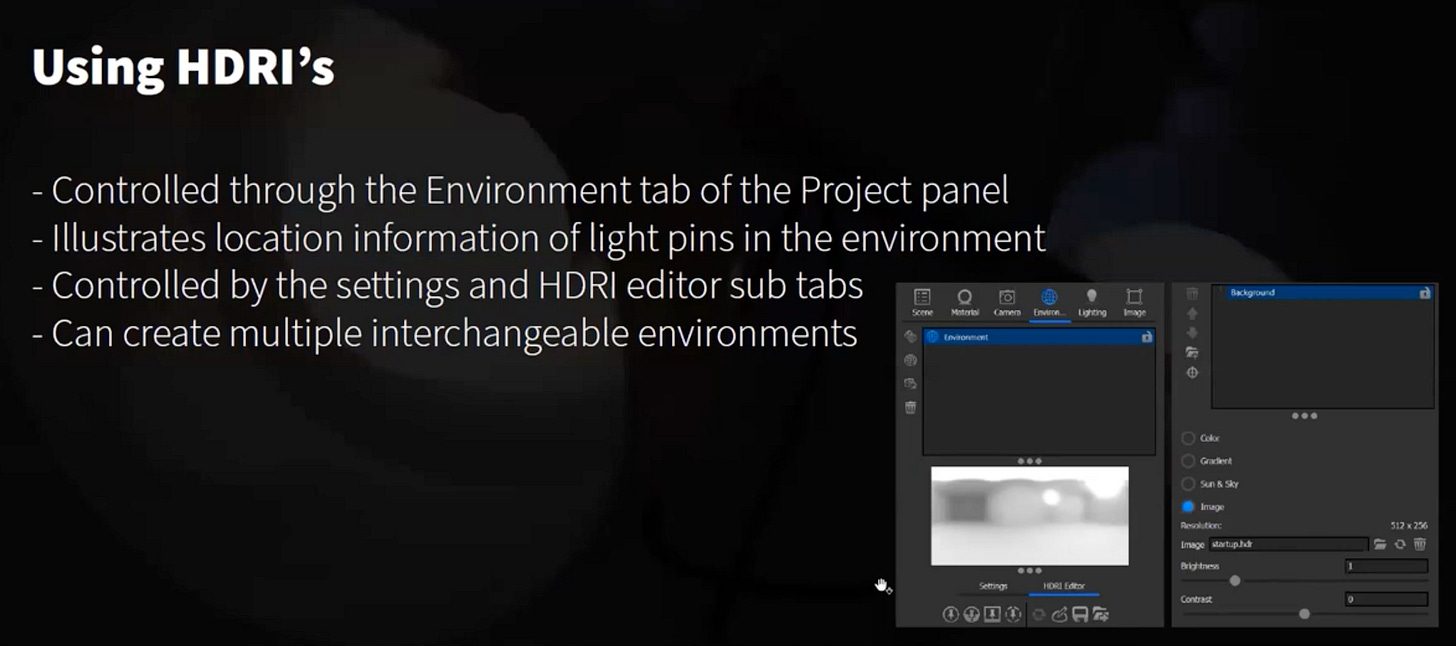
The “Environment” tab provides comprehensive control over your chosen HDRI:
Global Adjustments: Easily control brightness, contrast, size, height, and angle of your HDRI.
Background & Ground Effects: Manage background visibility, ground reflections, and shadows.
Multiple Environments: Create and switch between multiple environment setups non-destructively, allowing for quick comparisons of different lighting scenarios without losing your work.
The HDRI Editor: Granular Control for Custom Lighting
The “HDRI Editor” is where granular control over your lighting environment truly resides. This powerful tool enables extensive customization:
Light Location & Color: Precisely position and color individual lights within your HDRI.
Highlight Targeting: Utilize the convenient crosshair icon to effortlessly place highlights on your model by simply clicking on the desired area.
Light Temperatures: Adjust the warmth or coolness of specific light sources.
Pin Lights: Add various types of pin lights (rectangular, circular, half-pins, or image-based) to customize existing HDRIs or build entirely new lighting environments from scratch, offering endless creative possibilities.
Expanding Your HDRI Library: More Options, More Creativity
While KeyShot comes with a robust library of preloaded environments, your options for HDRIs are virtually limitless:
KeyShot Cloud Library: A vast and continuously growing selection of HDRIs, many of which are user-created and community-approved. You can also upload your custom HDRIs to share with the KeyShot community.
External Resources: HDR Haven (now Poly Haven) is a highly recommended and free source for high-quality HDRI maps. Other platforms like HDRI Labs and Aversis also offer excellent options.
Integrating Third-Party HDRIs: To use external HDRIs, simply add them to your KeyShot Program Files’ “environments” folder or designate a new folder in the Preferences window, making them readily accessible within your KeyShot library.
A graphic representing linking to external HDRI libraries.
Advanced Capabilities: Pushing the Boundaries of Realism
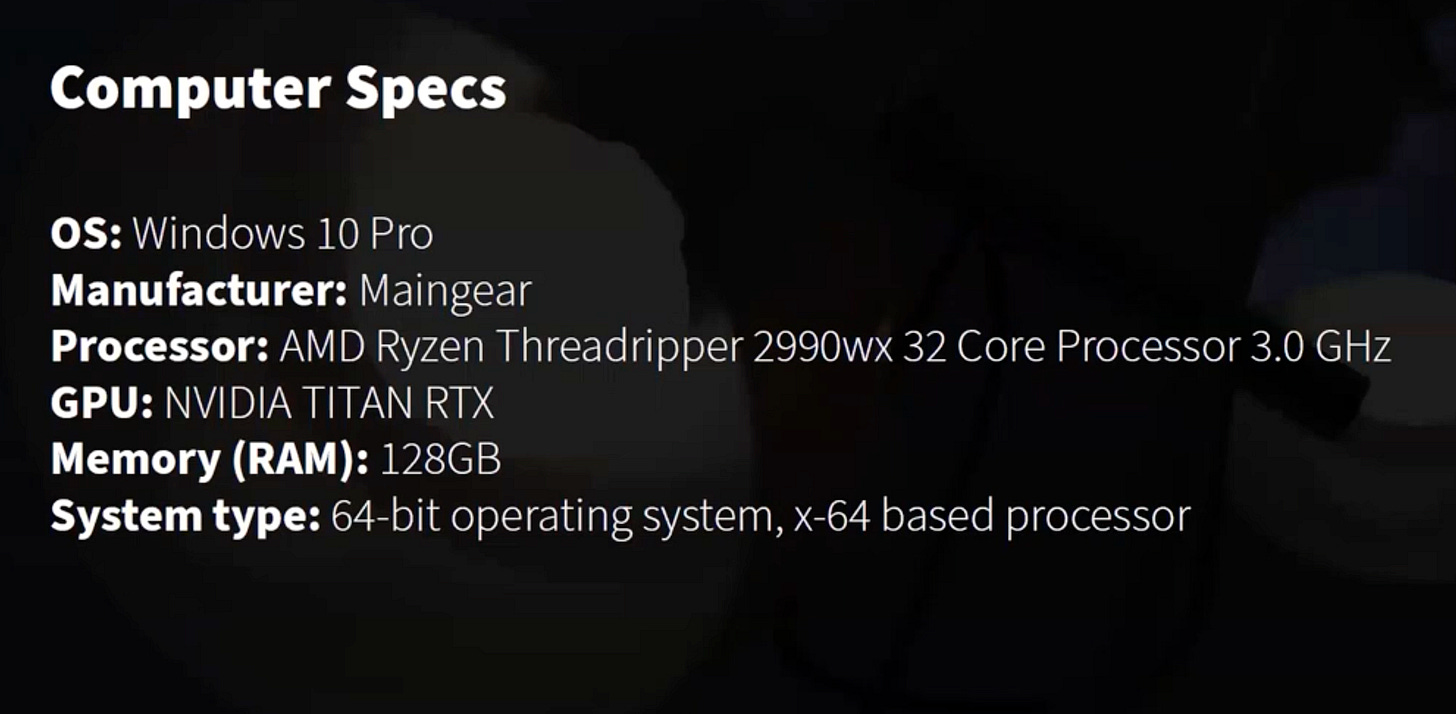
KeyShot is a continually evolving platform, with updated versions and new features regularly enhancing its capabilities. For instance, KeyShot 9.2 introduced NVIDIA Link support, significantly boosting GPU rendering capabilities by allowing users with compatible RTX 5000 GPUs to combine their memory, effectively expanding rendering capacity. We highly encourage anyone with an NVIDIA Link setup to explore this powerful upgrade.
Advanced lighting sessions delve into animating lights, creating dynamic environment rotations, and even linking lighting positions to camera movements for sophisticated scene interactions. The depth of KeyShot’s lighting tools means there’s always an advanced technique to learn, allowing users to push the boundaries of realism and creativity in their renders. Stay tuned to The Transcendent’s blog for updates on the latest KeyShot features and advanced tutorials!
Conclusion: Light with Purpose and Precision
Illuminating your product correctly in KeyShot is less about brute force and more about finesse, artistic vision, and technical understanding. Whether you’re meticulously placing physical lights to sculpt shadows or creatively manipulating HDRIs to capture the perfect ambient glow, remember that every lighting decision contributes to the final impact of your render. By mastering these essentials, you’re not just creating an image; you’re crafting a compelling visual narrative that speaks volumes about your design.
Embrace the role of a digital photographer, experiment with different light sources, and leverage KeyShot’s powerful tools to bring your visions to life with unparalleled realism and artistic flair. Happy rendering!
Table Summary: Key Lighting Elements in KeyShot
StepHeadlineDescription or Statistic1Three-Point LightingA foundational technique using Key, Fill, and Backlights for comprehensive product showcase.2Area LightingIdeal for soft, diffuse light (e.g., windows, studio panels); larger areas mean softer shadows.3IES LightingSimulates real-world light output; crucial for architectural accuracy (requires real-world scene units).4Point LightingOmnidirectional light (like a bulb); creates strong, hard shadows; adjustable radius for shadow sharpness.5Spot LightingConical light beam for dramatic focus (e.g., overhead vehicle lights); can create volumetric effects with scattering medium.6HDRI EnvironmentsEfficient for global illumination and ambient light; faster rendering times, uniform object illumination.7Physical LightsAccurate real-world light interactions; dynamic shadows, unparalleled realism, more control over direct illumination.8Lighting PresetsFive options (Performance, Basic, Product, Interior, Jewelry) plus custom for global image adjustments and optimized realism.9HDRI EditorGranular control over environment lighting: adjust pins, colors, highlights, and temperatures.10Expanding HDRIsUtilize KeyShot Cloud, HDR Haven (Poly Haven), or import custom maps for diverse lighting scenarios.11KeyShot 9.2+ AdvancementsImproved GPU rendering (NVIDIA Link support for RTX 5000), bug fixes, enhanced importers/plugins.
FAQs: Your Lighting Questions Answered
How do I save a custom HDRI environment in KeyShot?
What are the best practices for managing units and scale when importing models from different sources?
Can I animate lights in KeyShot?
Can I lock the position of lighting to the camera position?


Comments
Post a Comment